SMT Hand Soldering Tips and Tricks
Many people are intimidated by SMT soldering, fearing that the closeness of the pins will make it difficult to solder without creating one big mess or that it requires a bunch of expensive specialized equipment to be able to do it properly. None of that is true. SMT soldering, even down to some of the smallest components, can easily and quickly be done by hand. Custom Circuit Solutions LLC has 20+ years of soldering SMT prototype circuit boards by hand, this document offers some of our greatest soldering tips we've learned over the years.
Flux, Flux, and More Flux
Flux is by far the most critical factor in SMT soldering. Flux breaks down the oxide layers of the metals being soldered and allows the solder to flow where it is supposed to. Without it, you will get lumpy looking solder joints that are dull looking, rather than bright and shiny. There are three types of flux: rosin, water soluble, and no clean. Rosin based is the strongest but requires special cleaners to remove it from the board. No clean is the weakest but doesn't need to be removed from the board. However, leaving it on some precision circuits can cause problems. Our preferred flux is water soluble, such as the Kester 2331ZX Water Soluble Flux Pens . It works well and can simply be washed off in the sink. With no clean, once you apply it, you can only hit it with heat once before it stops working. With the water-soluble type mentioned above, once you apply it, you can typically hit with heat 2-3 times before it needs to be reapplied. We often get asked how much flux to use, the answer is you cannot use too much. When soldering large chips, it is not uncommon to reapply flux 3-4 times.
Solder Type
Solder comes with the same three flux types inside the core. We recommend a water-soluble based solder such as Kester 331 Organic Core Solder. The size of the solder wire doesn't necessarily matter but we like to use two different sizes. We use a small core size when working on large chips with small pitch pins. We touch the tip of the soldering iron just briefly to the end of the solder wire to apply just the right amount of solder to the tip that we can then drag across the pins. If the wire is too large it will apply too much solder and it will make more bridging when dragging across the pins. Not that it can't be cleaned up, but it takes longer. We use the large core solder for when we are doing the through hole soldering and need to apply much larger amounts of solder quickly. Doing so with small core wire would take longer and require feeding in a lot of it to the solder joint.
Solder Tips
We see many people make the mistake of trying to use the smallest solder tip possible when soldering small SMT components or they think they need a wide range of tips. Small tips don't provide enough surface area to quickly heat the pads and larger tips can be harder to work with. We use a 1/16th inch chisel tip for everything, from 0402 resistor/caps all the way up to 200+ pin devices with 0.4mm pin spacing. How often we change a tip depends on a number of factors but typically they should last several months, only changing them when we notice that heat does not seem to be transferring as well. The part we use is the Pace 1121-0499-P5 1/16 Chisel Solder Tip.
Solder Heat
Your soldering iron must be set high enough so that the solder flows instantly when touching the pads but not so high that it damages the component if left touching for several seconds. For lead based solder, we typically leave our irons at 365 deg C. We only adjust it up if we are working on a large board with a lot of copper than can suck the heat right out of the area quickly. If you have to leave the soldering iron tip on a pad for more than several seconds in order to get the solder to flow, then you need adjust the temperature up. Lead free solders also require higher temperatures to flow. Most soldering irons will work just fine for this. We personally prefer Pace equipment such as this soldering station PACE MBT 350 (MBT350) Multi-Channel Soldering Desoldering Station.
Pre-Heat
Pre-heating the board and parts you are soldering is one of those things that is not absolutely necessary but can make soldering easier, especially if the board is large. Our preferred method of applying pre-heat is a board warmer that the board sits on and continuously heats the boards. We use a Pace IR board warmer under every board we solder. It puts heat into the board so that when you hit a pad with solder, the heat doesn't dissipate out to the cold areas of the board. Rather, if the board is warm, the solder with flow almost instantly the second the solder touches the pad. If you don't have an IR board heater, a hot air gun can also be used to warm up the board before you begin soldering, but without the constant heat going into the board you will have to reheat it often. While spendy, board heaters can be worth it. Such an example is found here: Pace PH-100 - Low Profile PCB Preheater
Inspection Equipment
You do not need fancy inspection equipment to do SMT soldering, even down to the smallest components. All we use is good lighting and a pair of reading glasses. Even if you don't need reading glasses to read, we recommend a good pair of high magnification glasses, such as these High Magnification Power Reading Glasses - Ultra Clear . It makes soldering small components much easier. The only time you need more powerful inspection equipment is if you trying to inspect the individual pins of an IC such as QFP, QFN, or SOP packages. While you could invest in an expensive microscope for this, we just use an inexpensive borescope or a high magnification digital camera that connects to a computer.
Putting it all together
So, how do you recommend we solder our SMT modules?
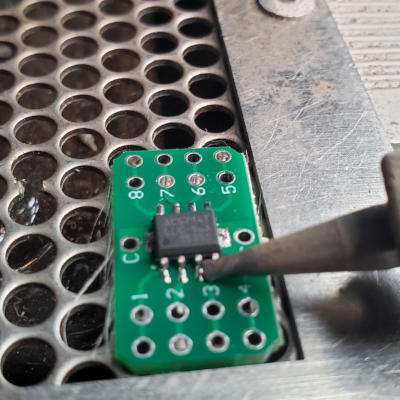
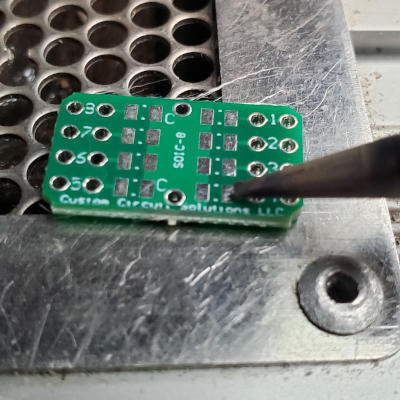
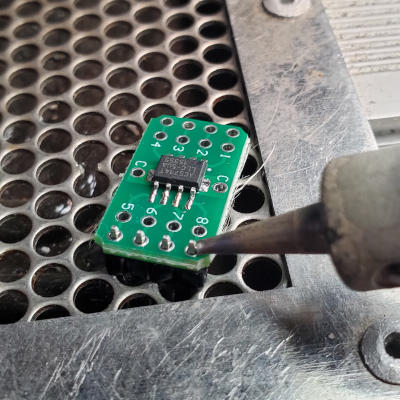
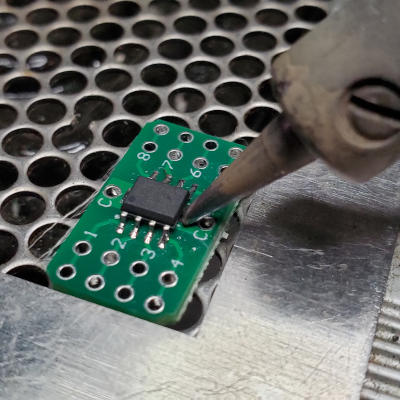
If you have a board heater, you could start by warming your SMT to DIP breakout module board. If you don't have one, don't worry, the board is small enough that it's not necessary. The next step is to apply flux across all the pads where the SMT device will be soldered. Then, use tweezer to position the IC device onto the pads. Be sure to pay attention to the orientation of the component so that pin 1 of the device lines up with pin 1 of the board. Using your soldering, touch the tip of the soldering iron to your solder wire so that a small amount of solder sits on the end. Next, holding the IC in position with the tweezers, touch at least two of the IC pins with the tip of the iron so that it holds the chip in place. The solder should easily flow (because of the flux that was put down) directly to the pins. Once the chip is attached, take the flux pen and flux both sides of pins of the chip, down to the pads. Don't worry about using too much, more is better. Lastly, apply more solder to the tip of the iron. This time, drag the soldering iron tip across the pins quickly. The solder should flow directly to the pins. This process should not take more than 20-30 seconds.
But what happens if some of the pins are soldered together?
This is common, especially if you have too much solder on the tip of your iron when you drag it across the pins. While you could use solder wick to remove the excess, it is unnecessary. Just wipe any excess solder off the tip of your iron, then reflux all the pins and drag the iron back across the pins. The excess solder will get picked up on the soldering iron. If there is a lot of excess, you may have to do this several times, but it will clean up just fine.
What about soldering the 0805 pads to ground and between pins?
It's easiest to do these before you attach the through hole pins that are used to mount the PCB. But, if you need to make changes to the circuit after the pins are soldered in, it is certainly doable.
How is the center pad soldered on chips that require it?
The ends of the center ground pad were extended beyond the length of the chip so that it could be directly soldered using a soldering iron, rather than requiring hot air. The best method for soldering this pad is to put down a small amount of solder paste on the pad before placing the chip on the board. Then, you simply touch the soldering iron to the ends of the center pad, and it will solder it to the chip. If you do not have solder paste available, you can pre-solder the center pad so that small amount of solder is already present. This is best done by fluxing the pad, then dragging the soldering iron over it quickly so that a small solder bump is present. Then you can place the chip on top of this bump. Once you hit the end of the pad with the soldering iron, the chip will flatten it out and settle into position, with the center pad now being soldered.
For more information contact us at info@customcircuitsolutions.com or check out our YouTube channel. For a downloadable PDF version of this document click here


